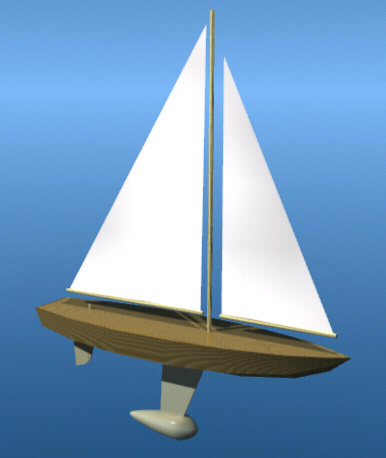
3D rendering/mockup
The main design priorities for the physical boat (aside from actually being able to sail!) are as follows:
- Durability - don't want any failure due to frail boat design! It should have a fighting chance of surviving in the open ocean.
- Simplicity - want to keep it simple because there's a good chance it could get lost, a boat may run it over, someone might steal it, etc.
- Minimal Cost - for all the same reasons stated above for 'Simplicity'.
Specs:
Length: 60 inches (5 feet)
Width: 1 foot, 3.4 inches
Hull Height: 7 inches
Mast Height: 4 feet, 5.5 inches
Keel Height: 1 foot, 1.8 inches
Total Height: 6 feet, 2.3 inches (hull, mast, keel)
Weight: (to be determined)
Total Sail Area: approx 8 square feet
Video:
 Bulkhead templates explanation
Pictures:
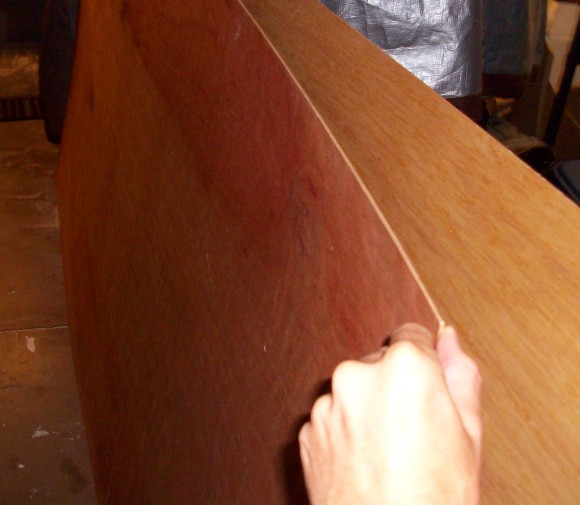
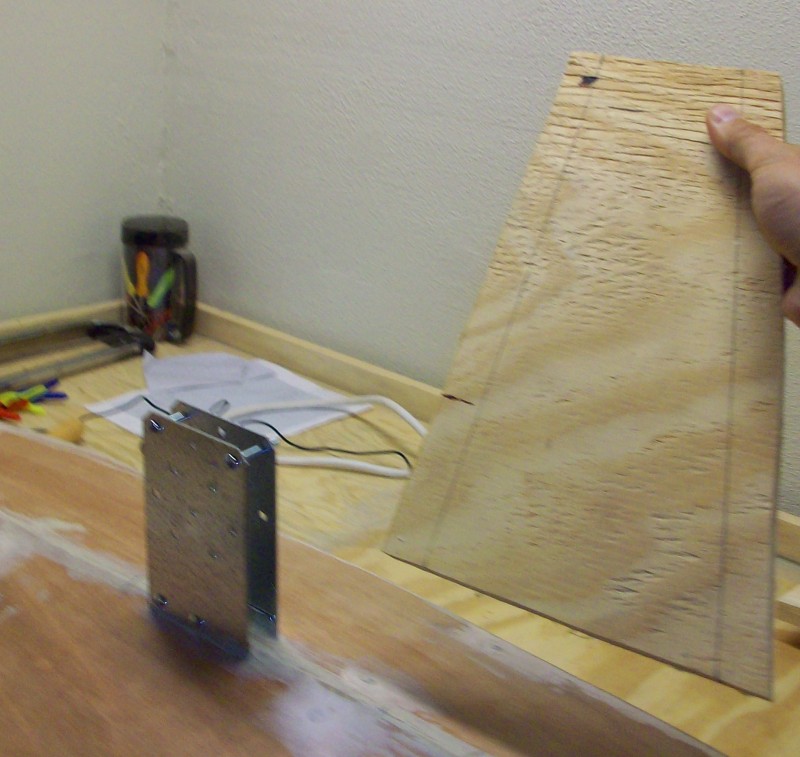
Thin, flexible wood for the boat's siding.
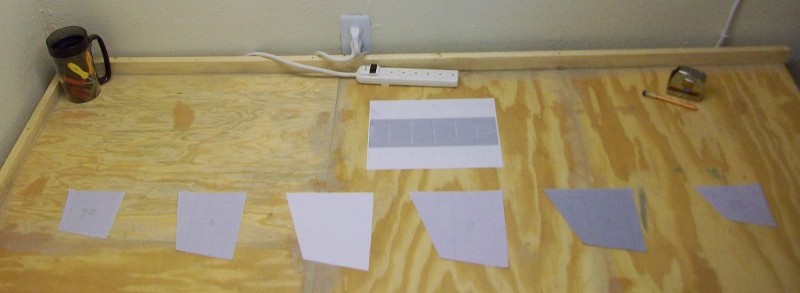
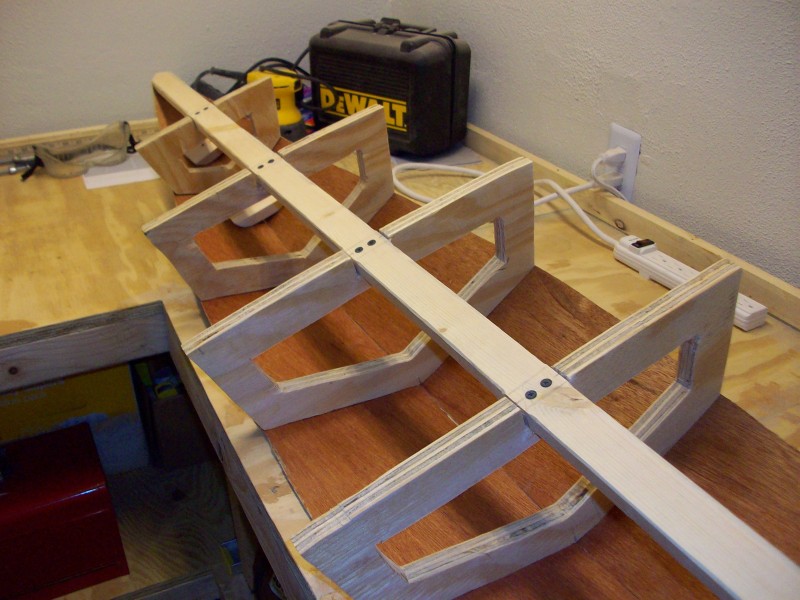
Templates for bulkheads
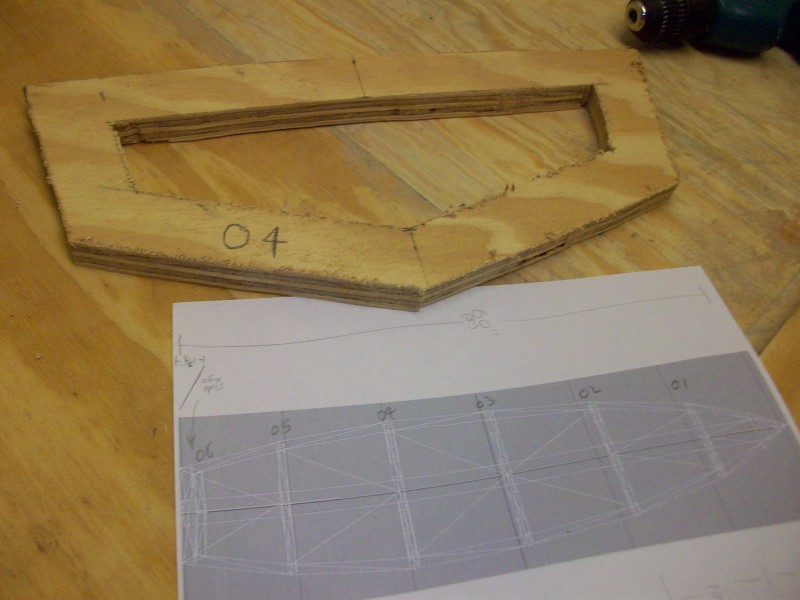
Bulkhead #4 cut out

Bulkheads and 'stringer'
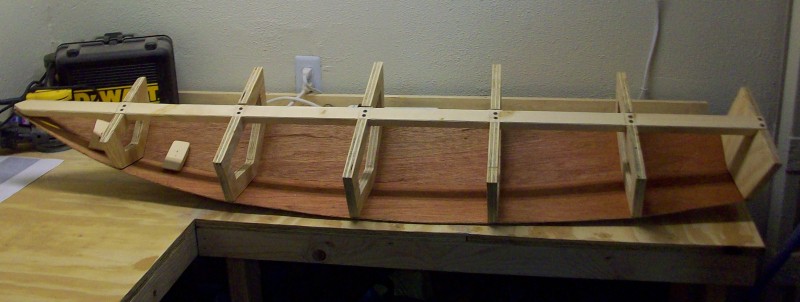
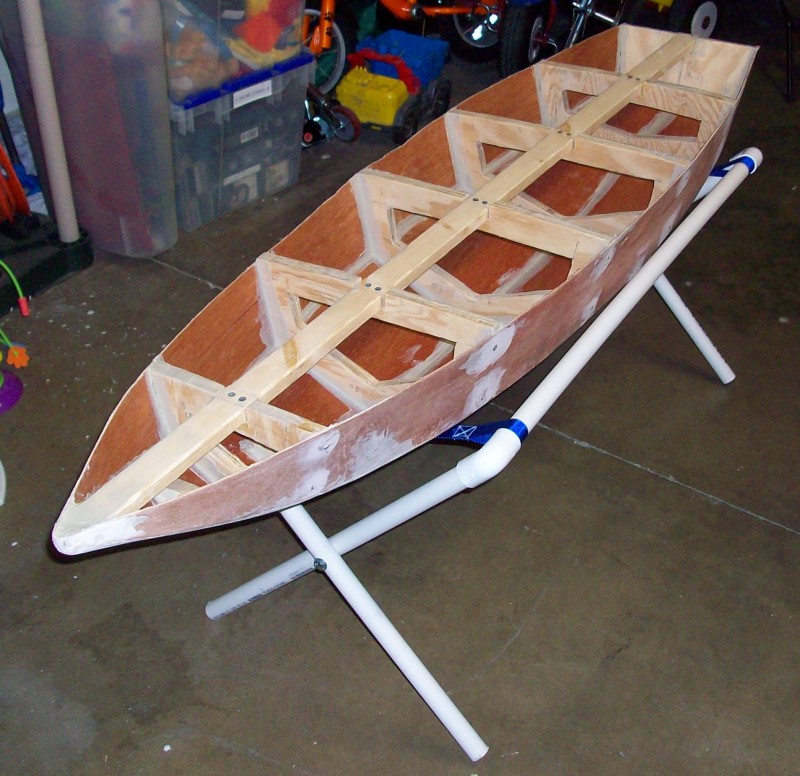
Bottom 'skin' on boat. Still needs sides and top...
Bottom 'skin' on boat. (alternate view)
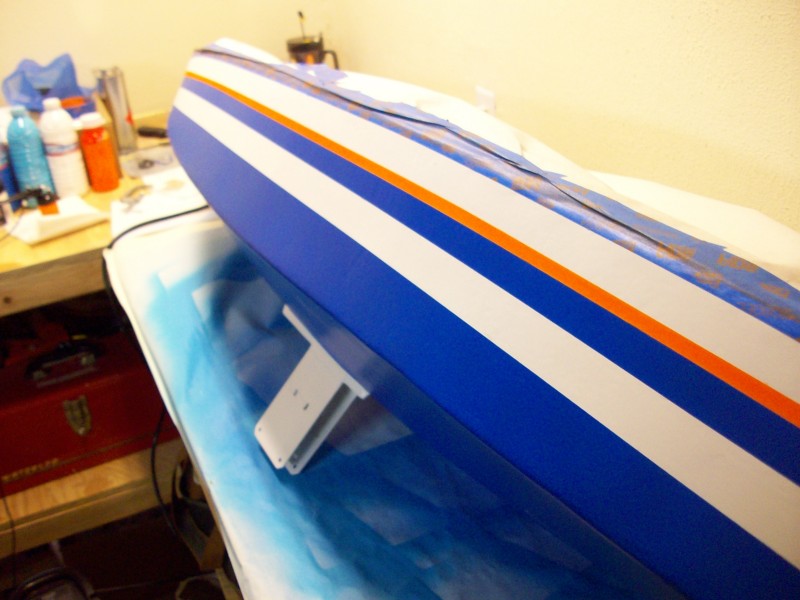
Side 'skin' on boat. (Also showing new boat stand I made today). Note that the ugly patching on the boat's sides will be painted over. I had some gaps to fill and some screw heads to cover. 😉
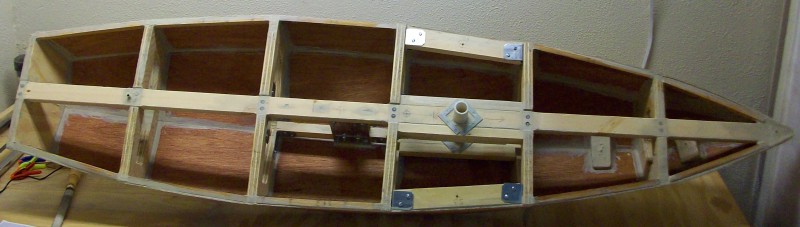
Hull inside is nearly completed.. At this point, I'm ready to apply resin on the insides of the hull before adding the deck. There will be some minor additions made as hardware is acquired. For example, mounting for the rudder servo, etc.
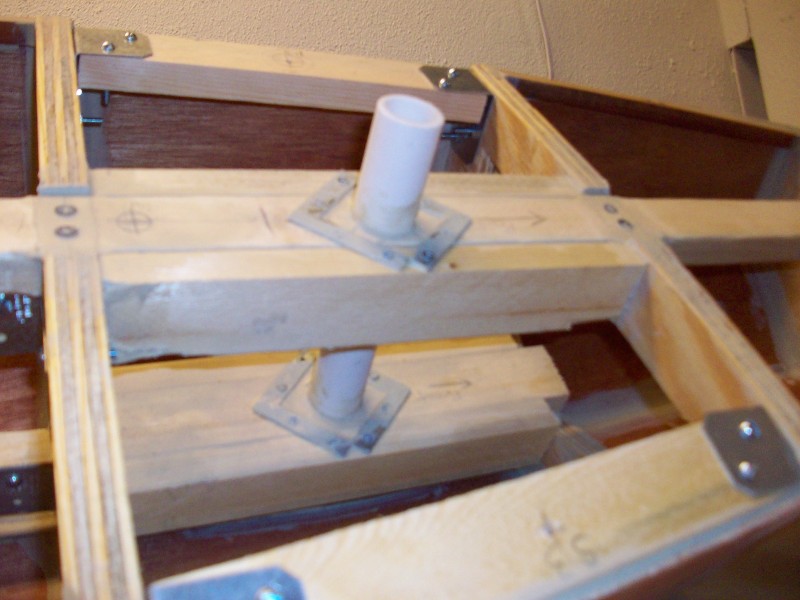
Closeup of mast mount. I used 3/4 inch PVC pipe and mounted it securely into the hull. All the wood surrounding it may look like overkill, but keep in mind an awful lot of pressure will be transferred from the sails to this location. The lines that run from the top of the mast (the 'stays') will also distribute the pressure and help keep the mast in place as well.
Closeup of keel mount. The 3/4 inch plywood keel (still needs to be shaped, painted, sealed, and necessary weight 'torpedo' added) will be removable for easier storage and transport. The thick, stainless steel ties should be plenty strong and are mounted securely and permanently on the inside of the hull.

My Dad thoughtfully put together this "Fiberglass Kit" for me since he had access to the materials and plenty of experience to lend me some tips - Thanks Dad!!! I will be using epoxy resin to seal the boat water tight and give it additional strength with a layer of fiberglass.
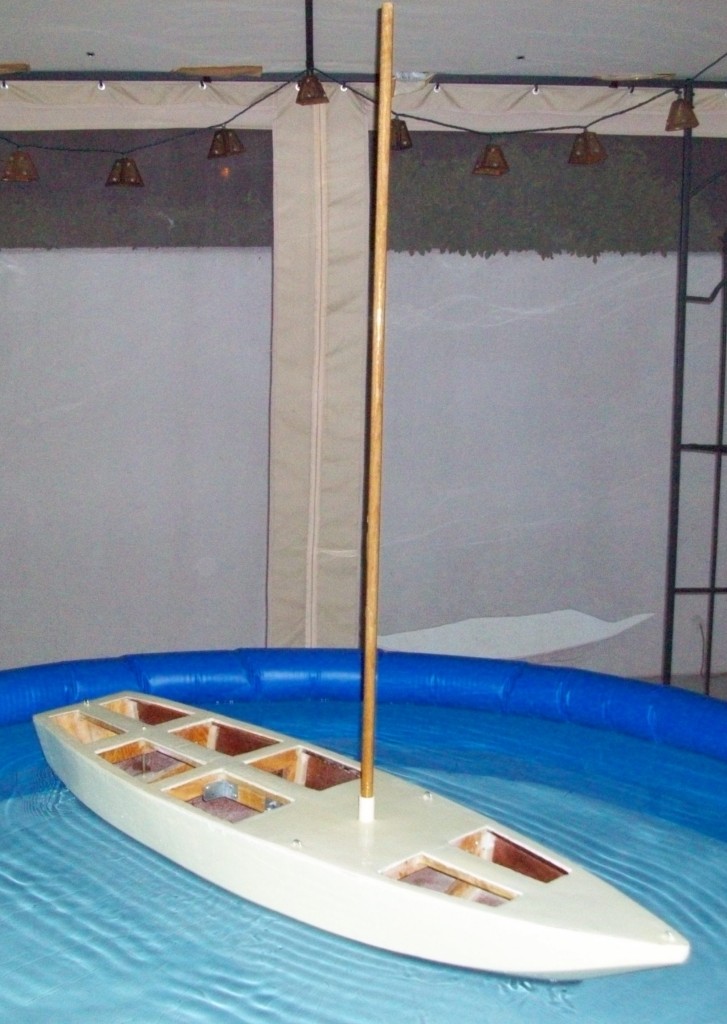
The first float test, and I'm happy with the results! This is without the keel attached, so it will sit even better in the water once it is attached and weighted. The boat feels quite stable even without the keel, so I'm stoked! I had set the mast in to test stability as well, but obviously the sail and boom are not done yet.
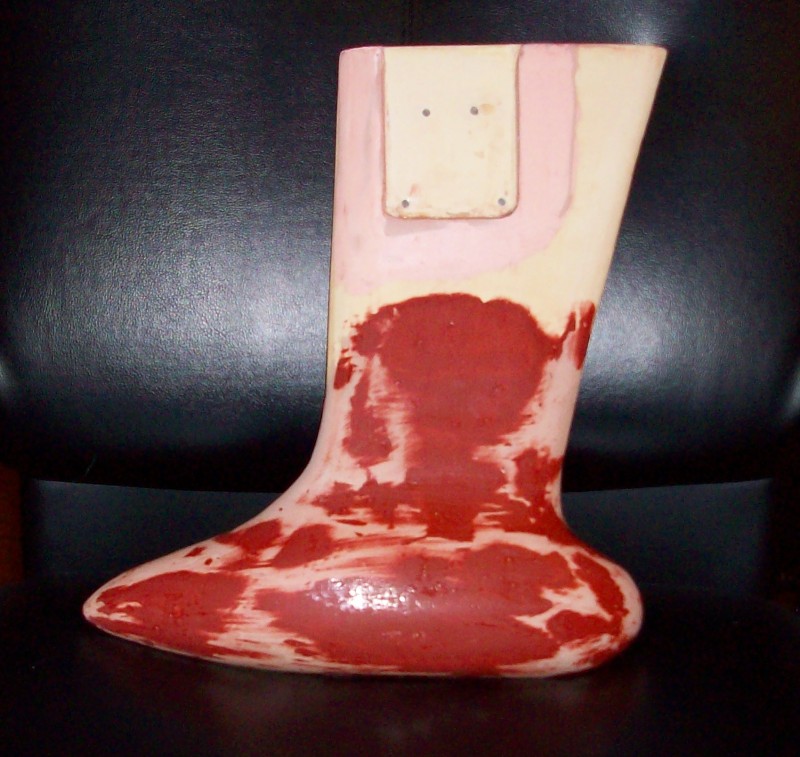
This is the keel (unpainted, of course). Encased in all that ughly bondo, are 2 huge, cube-shaped, lead weights bolted to the keel. It weighs over 10 pounds. That may not sound like a lot, but it's quite heavy when you're actually holding it.. With it's length, it has a huge amount of leverage on the boat. If anything, I expect this iteration of the keel to be overkill and will likely need to be lightened up a bit to optimize speed.
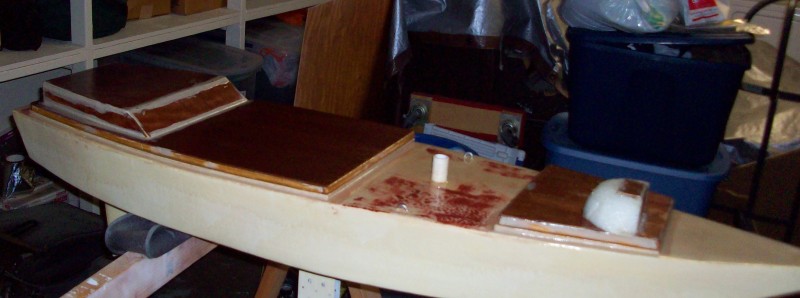
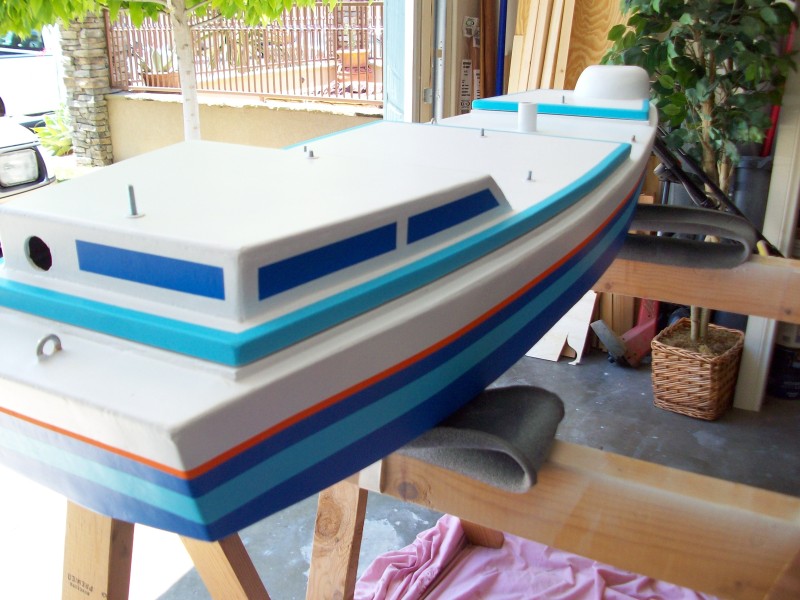
Note that everything will look much cleaner with paint. There is a lot of construction adhesive, etc that I never really intended for anyone to see. It was painful posting these pictures. The dome shape towards the front of the boat will house the front-facing camera, while the 'cabin' houses the rear-facing (I'm sorry, 'Aft') camera.
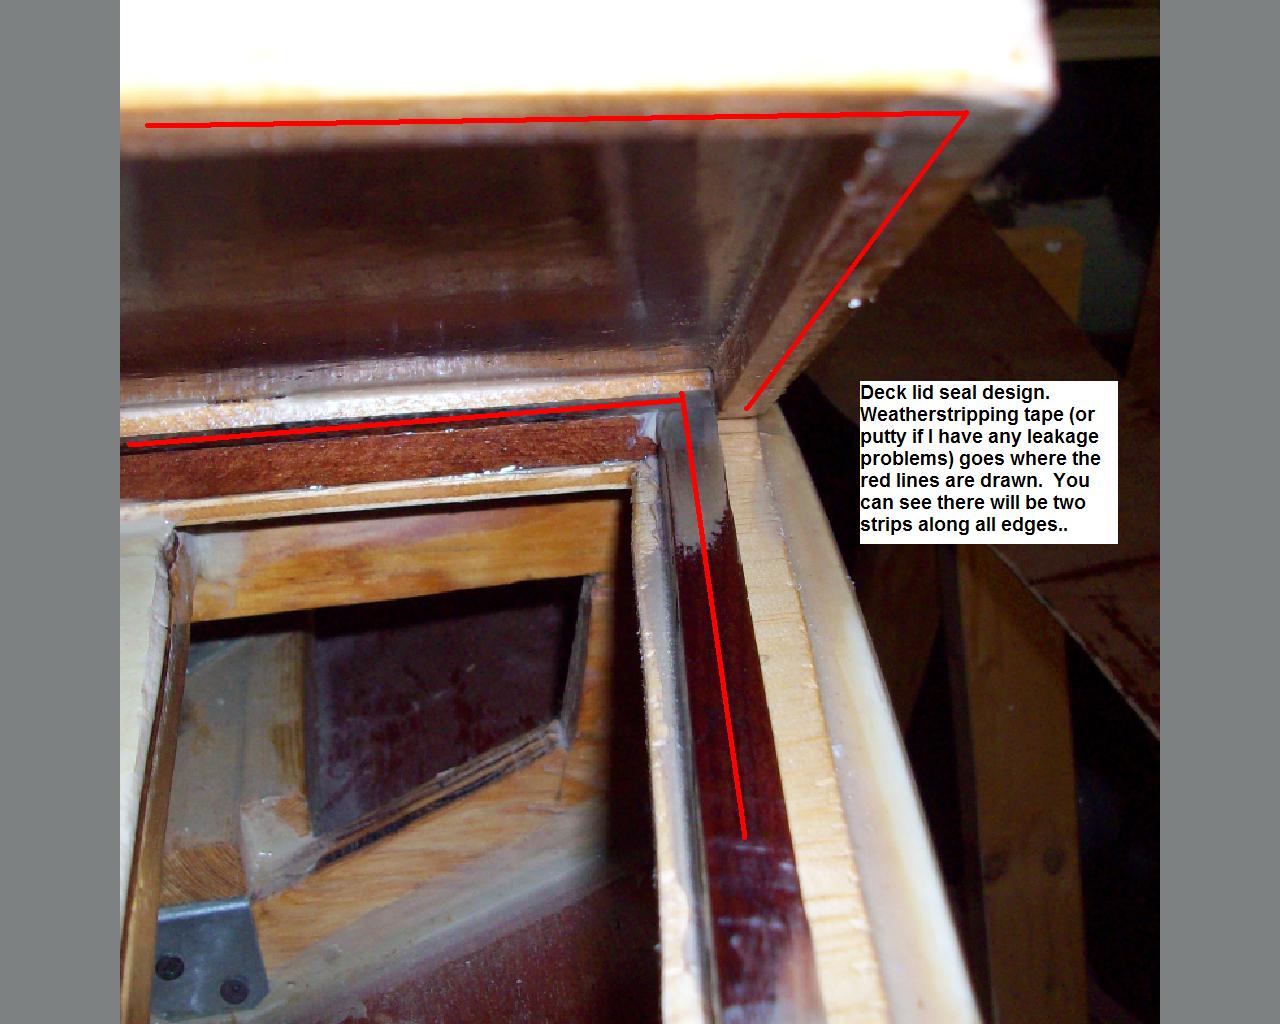
This is just a close-up of one of the lids partly open so you can see the way it will seal out water (hopefully!!). The red lines indicate where weather-stripping will be (or putty if necessary). The lids themselves bolt down to the boat using rubber gasket-lined washers and wing-nuts.
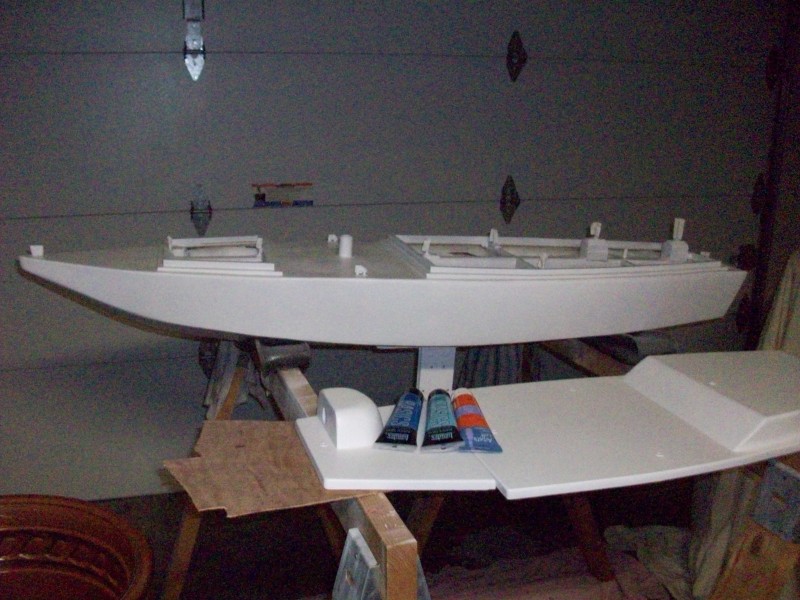
Paint - All white...
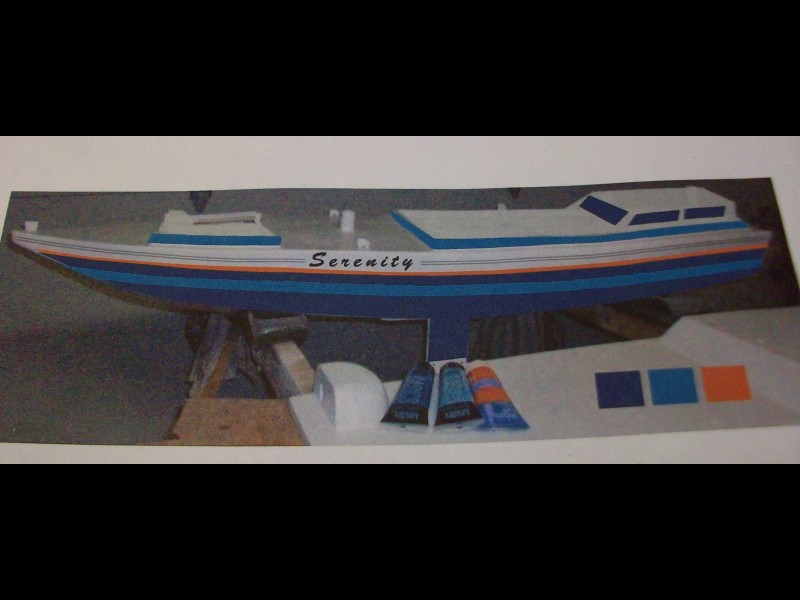
Paint - Photoshop mock-up

Paint - Airbrush and diluted paints
Paint - Lots of masking tape was used..
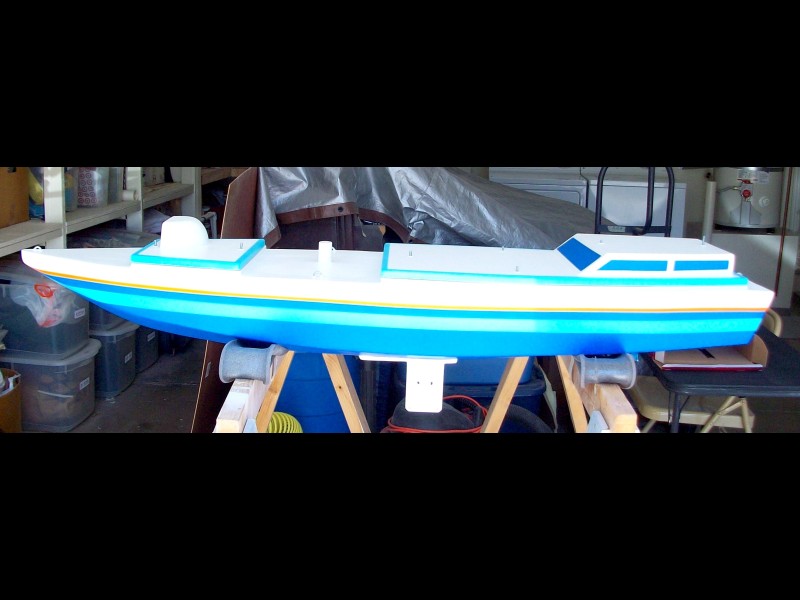
Paint - Full boat. Note the colors are a bit washed out in this picture..
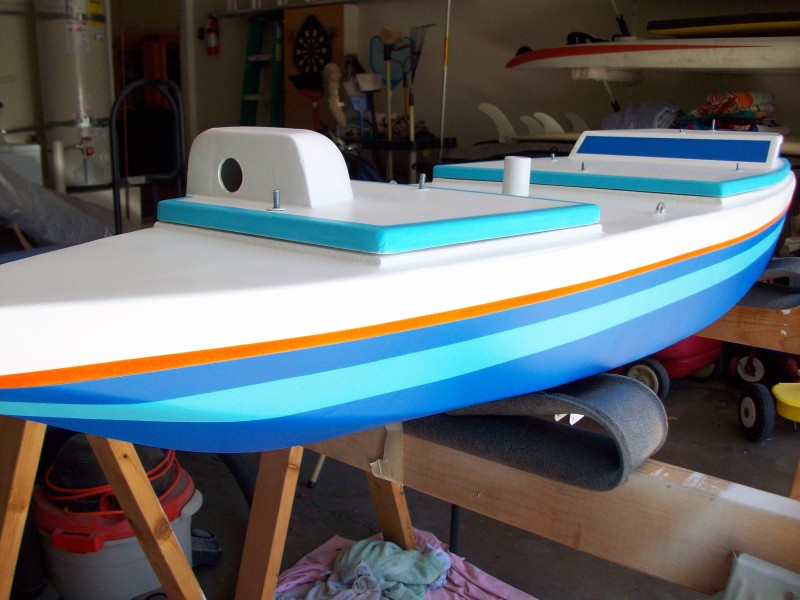
Paint - Front, showing front-facing camera hole.
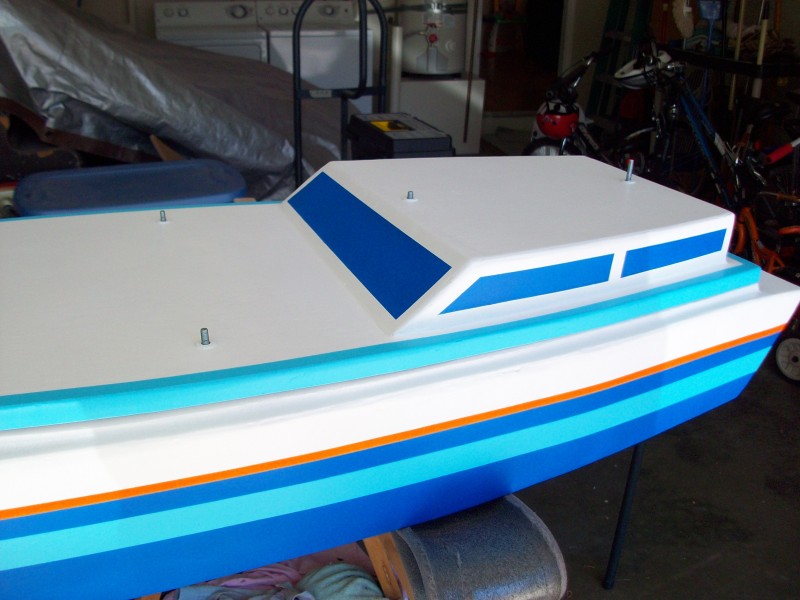
Paint - Cabin.
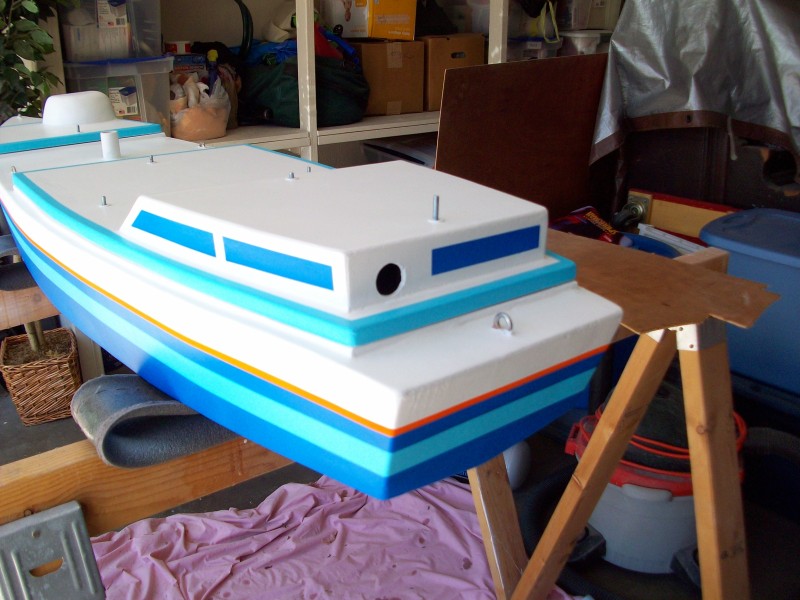
Paint - Rear, showing rear-facing camera hole.
Paint - Rear part 2
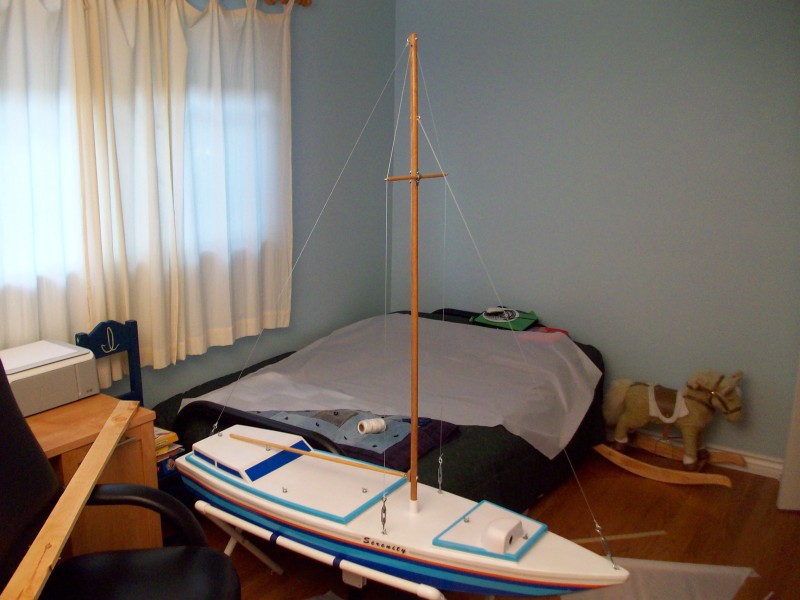
Rigging without the sails
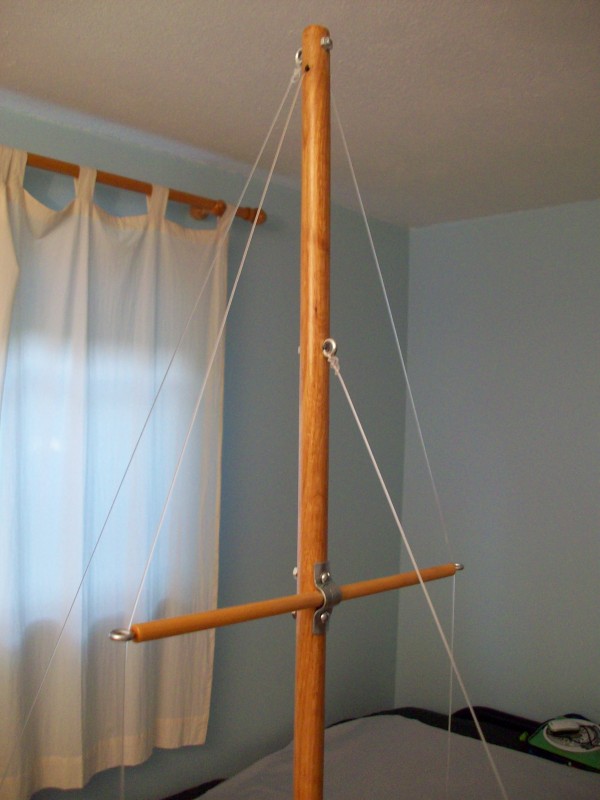
Rigging close-up
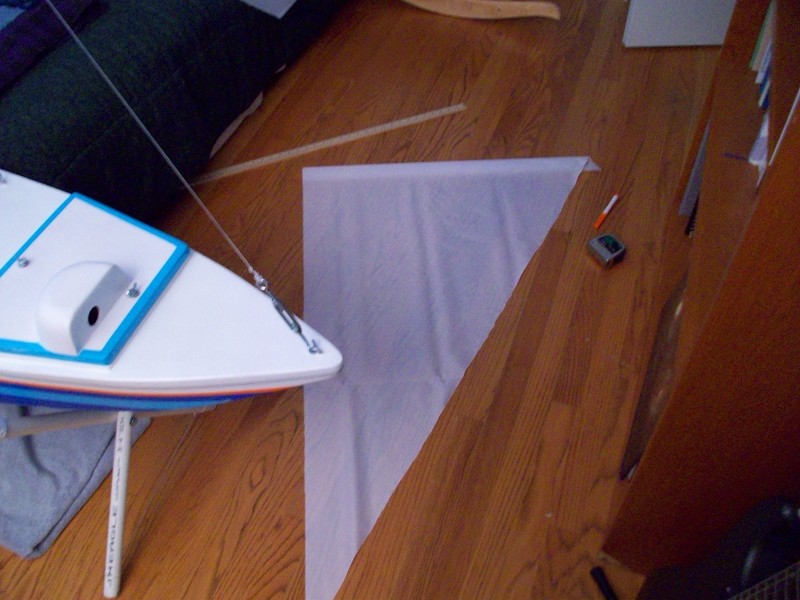
Cutting out the sails
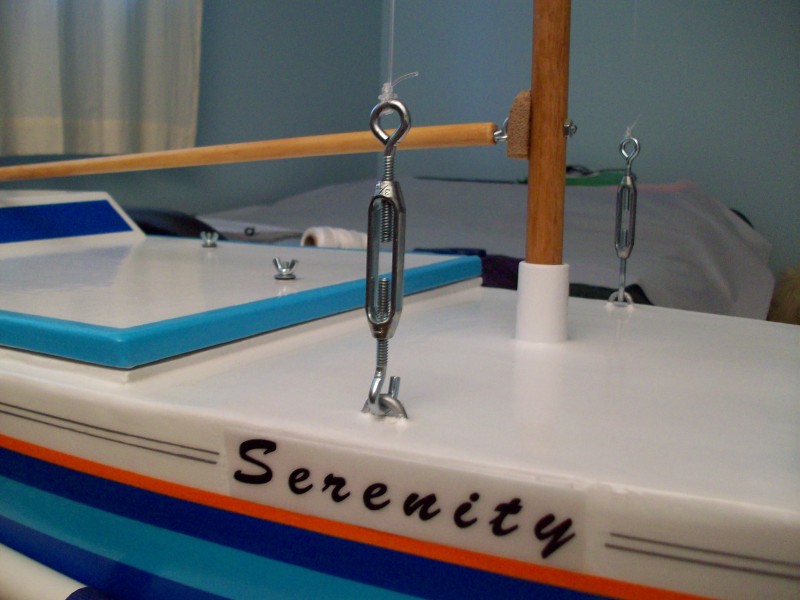
Rigging turn-buckles. These allow the rigging to be easily removed/attached/adjusted.
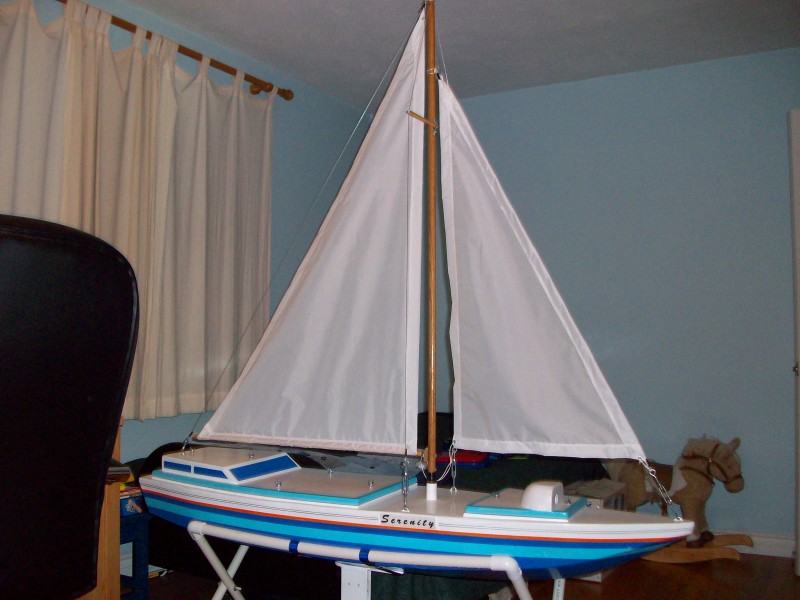
The full rigging with sails (though "main sheet" (boom line) is not yet installed in this picture)

Getting ready to set sail!
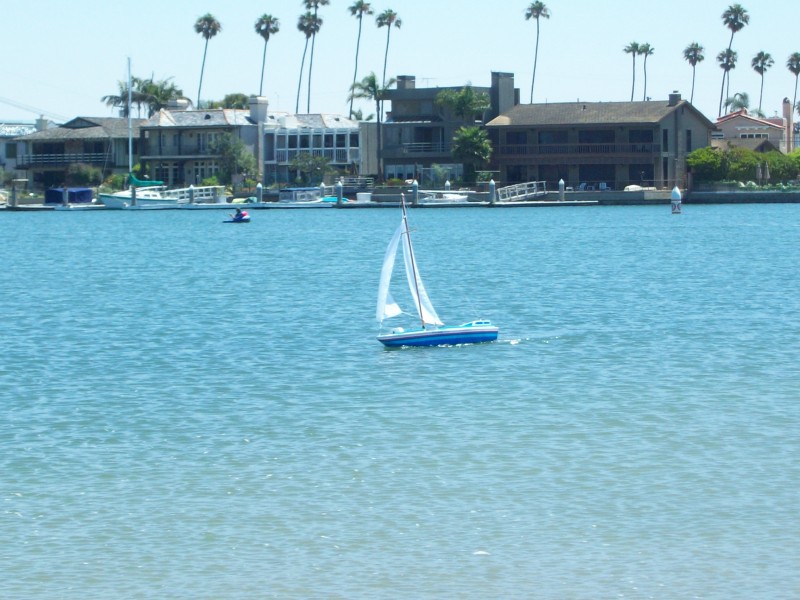
First full sailing test